POS-n-go Android POS Manual

The POS-n-go integration to PAX terminals supports sale, refund and settlement transactions.
Contact your payment processor for support and to enable the standard PAX semi-integration.
To configure a static IP address (Ethernet):
- Launch the Settings application on your PAX terminal.
- Enter the password pax9876@@ or the one provided by your payment processor.
- Select Network & Internet.
- Select Ethernet.
- Select Ethernet Configuration.
- Select Static IP Settings.
- Enable Use static IP.
- Configure IP address to 192.168.55.4.
- Configure Gateway to 192.168.55.1.
- Configure Netmask to 255.255.255.0.
- Configure DNS 1 to 8.8.8.8.
- Configure DNS 2 to 8.8.4.4.
- Select Save.
To configure a static IP address (WiFi):
- Launch the Settings application on your PAX terminal.
- Enter the password pax9876@@ or the one provided by your payment processor.
- Select Network & Internet.
- Select WiFi.
- Select the posngo WiFi network. The password is dinamikos.
- On the WiFi password screen expand Advanced options.
- Configure IP settings to Static.
- Configure IP address to 192.168.55.4.
- Configure Gateway to 192.168.55.1.
- Configure Network prefix length to 24.
- Configure DNS 1 to 8.8.8.8.
- Configure DNS 2 to 8.8.4.4.
- Select Connect.
POS-n-go Basic Setup, Devices, Device Settings:
- Configure Payment Terminal Processor to PAX.
- Configure Payment Terminal IP to 192.168.55.4.
- Configure Card Type to On if your payment processor does not support auto EDC.
- Contact your payment processor to enable the semi-integration for your device in PAXSTORE.
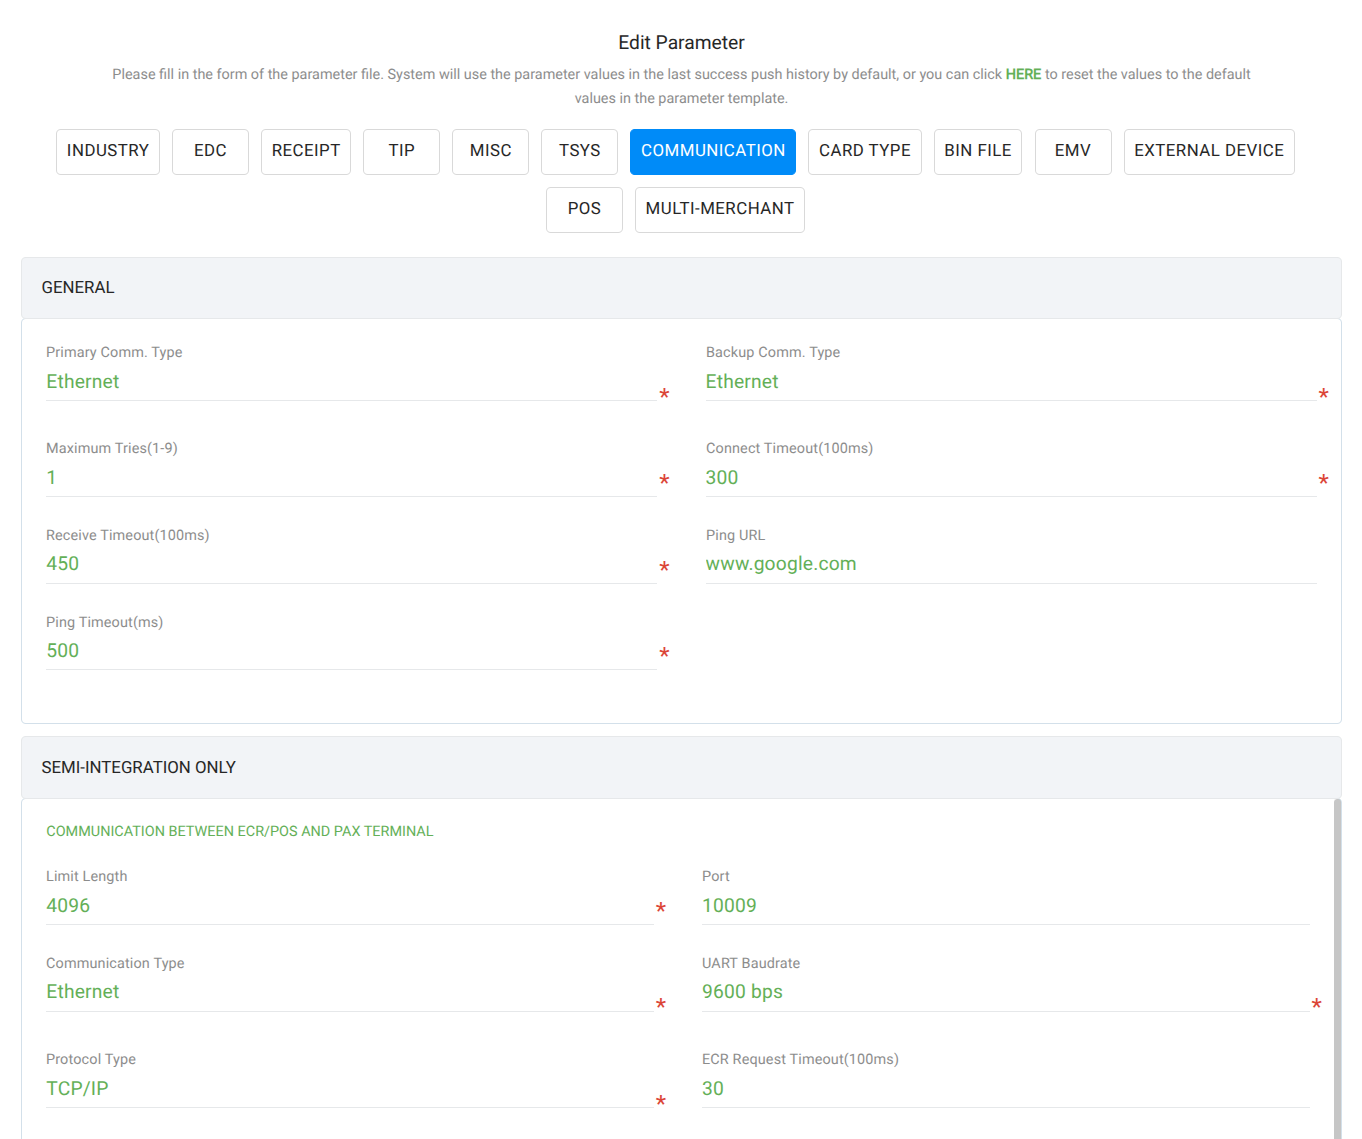
- In PAXSTORE section MISC, GENERAL SETTINGS set ECR-Terminal Integration Mode to External POS.
- In PAXSTORE section COMMUNICATION, SEMI-INTEGRATION ONLY set Communication Type to Ethernet.
- In PAXSTORE section COMMUNICATION, SEMI-INTEGRATION ONLY set Protocol Type to TCP/IP.
- In PAXSTORE section COMMUNICATION, SEMI-INTEGRATION ONLY set Port to 10009.