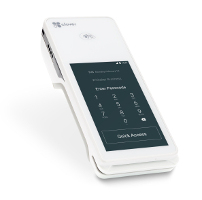
POS-n-go Android POS Manual

The POS-n-go integration to Clover terminals supports sale and refund transactions.
Clover client services can be reached at 1-888-263-1938.
To manually process a sale or refund transaction.
- Touch all 4 corners of the Clover screen at once.
- Select the Sale or Refund application.
- Process the transaction.
- When done launch the Network Pay Display application.
- Select Start to enable the integration.
To configure a static IP address (Ethernet):
- Launch the Settings application on your Clover terminal.
- Select Ethernet.
- Select Static IP Settings.
- Enable Use static IP.
- Configure IP address to 192.168.55.4.
- Configure Gateway to 192.168.55.1.
- Configure Netmask to 255.255.255.0.
- Configure DNS 1 to 8.8.8.8.
- Configure DNS 2 to 8.8.4.4.
- Select Save.
To configure a static IP address (WiFi):
- Launch the Settings application on your Clover terminal.
- Select WiFi.
- Select the posngo WiFi network. The password is dinamikos.
- Enable Advanced options.
- Configure IP settings to Static.
- Configure IP address to 192.168.55.4.
- Configure Gateway to 192.168.55.1.
- Configure Network prefix length to 24.
- Configure DNS 1 to 8.8.8.8.
- Configure DNS 2 to 8.8.4.4.
- Select Connect.
To configure the payment terminal semi-integration:
- Launch the More Tools application on your Clover terminal.
- Search for Secure Network Pay Display then select Connect.
- Select Download to install.
- Select Open to launch it. The Device Server and Network Pay Display applications will be installed automatically.
- In the Network Pay Display application select the menu button then Settings.
- Configure the Server Port to 10001.
- Select Configure and Restart Server.
POS-n-go Basic Setup, Devices, Device Settings:
- Configure Payment Terminal Processor to Clover.
- Configure Payment Terminal IP to 192.168.55.4.

